> ## Documentation Index
> Fetch the complete documentation index at: https://docs.hayami.moe/llms.txt
> Use this file to discover all available pages before exploring further.
# Custom websites
> How to configure custom websites (that is websites that aren't already provided out-the-box) with Hayami.
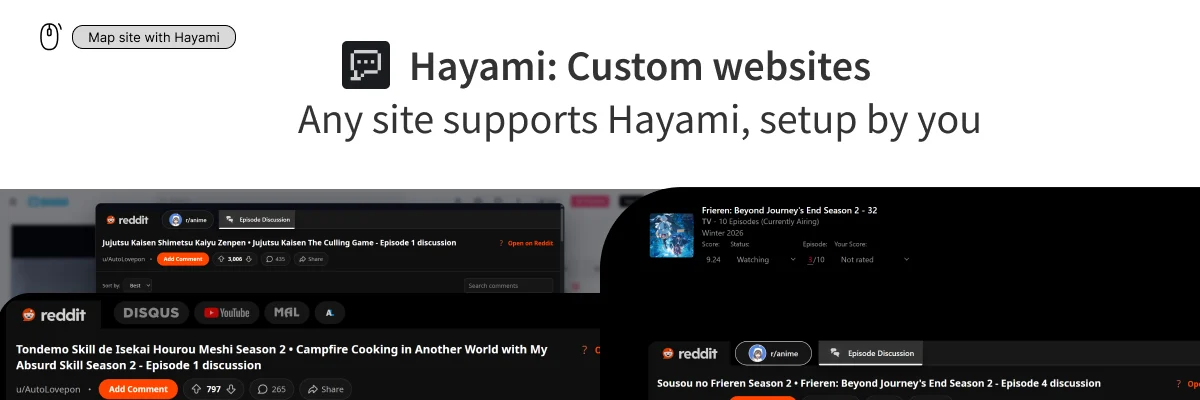 Hayami has support for [some websites](/getting-started#all-done-from-there) out-of-the-box, but due to the plethora of rapidly-growing online forums, communities, and anime streaming websites globally, Hayami may not support *everything* at once. But, with custom websites, any site can support Hayami, setup by you.
## How to configure custom websites with Hayami
Right click on the website you want to map to Hayami, and click "Map this site to Hayami". If Hayami doesn't have permission to access the site, you may get a popup requesting this permission. If you do, click 'Allow'.
Hayami has support for [some websites](/getting-started#all-done-from-there) out-of-the-box, but due to the plethora of rapidly-growing online forums, communities, and anime streaming websites globally, Hayami may not support *everything* at once. But, with custom websites, any site can support Hayami, setup by you.
## How to configure custom websites with Hayami
Right click on the website you want to map to Hayami, and click "Map this site to Hayami". If Hayami doesn't have permission to access the site, you may get a popup requesting this permission. If you do, click 'Allow'.
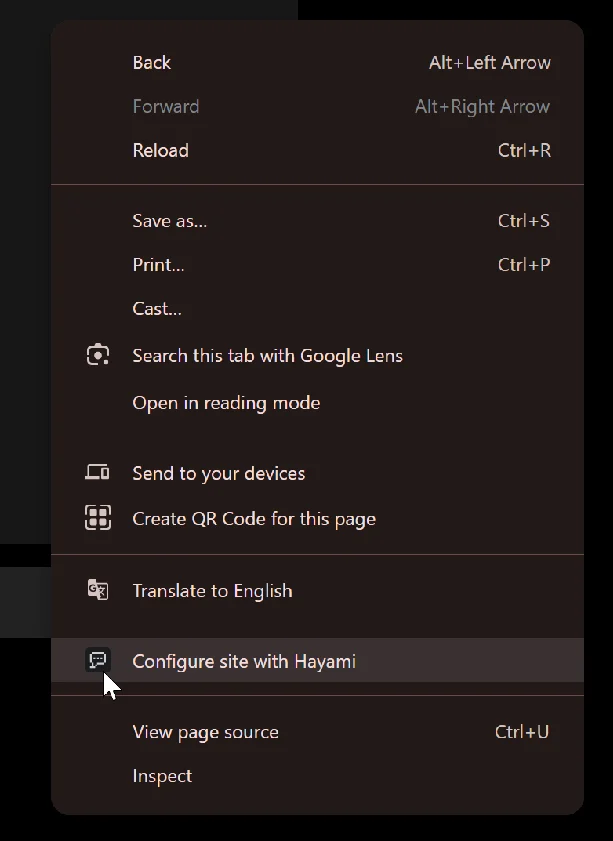 You should be faced with the 'Map this site to Hayami' prompt, allowing you to configure many features. You'll need to choose *how* you want Hayami to mount onto the site.
### Choosing your mapping mode
You should be faced with the 'Map this site to Hayami' prompt, allowing you to configure many features. You'll need to choose *how* you want Hayami to mount onto the site.
### Choosing your mapping mode
 See how each rendering mode performs down below.
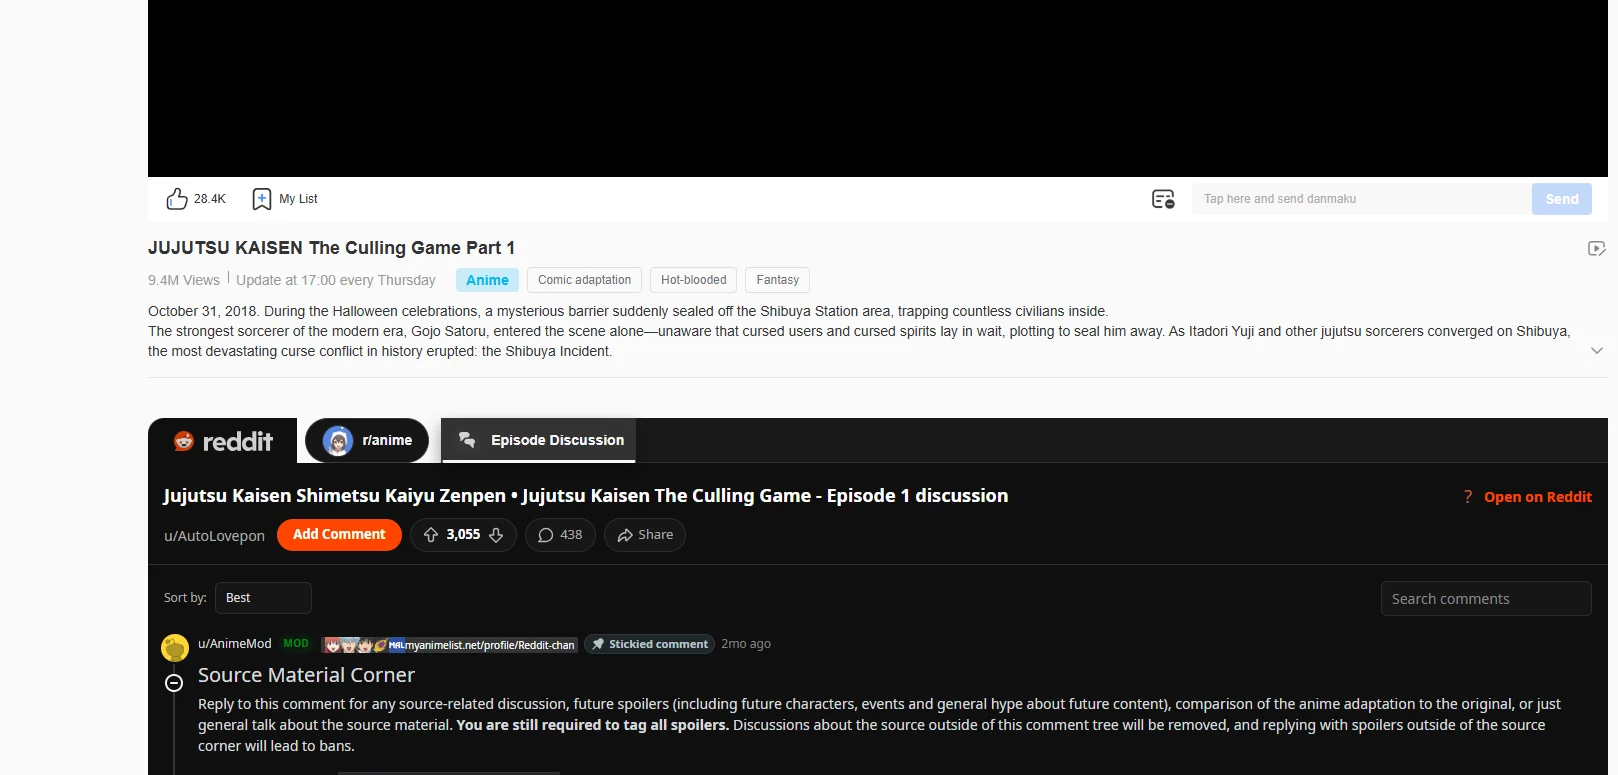
**Below element**: This puts the Hayami comments section ***below*** such element. You might want to put it below an existing comments section, below a title on the page, or just literally at the end of the page (HTML "body"). Choice is yours. An example is shown on below on a simulated anime platform example with just a video player with nothing on-page. There are many other use-cases this mode works effectively.
See how each rendering mode performs down below.
**Below element**: This puts the Hayami comments section ***below*** such element. You might want to put it below an existing comments section, below a title on the page, or just literally at the end of the page (HTML "body"). Choice is yours. An example is shown on below on a simulated anime platform example with just a video player with nothing on-page. There are many other use-cases this mode works effectively.
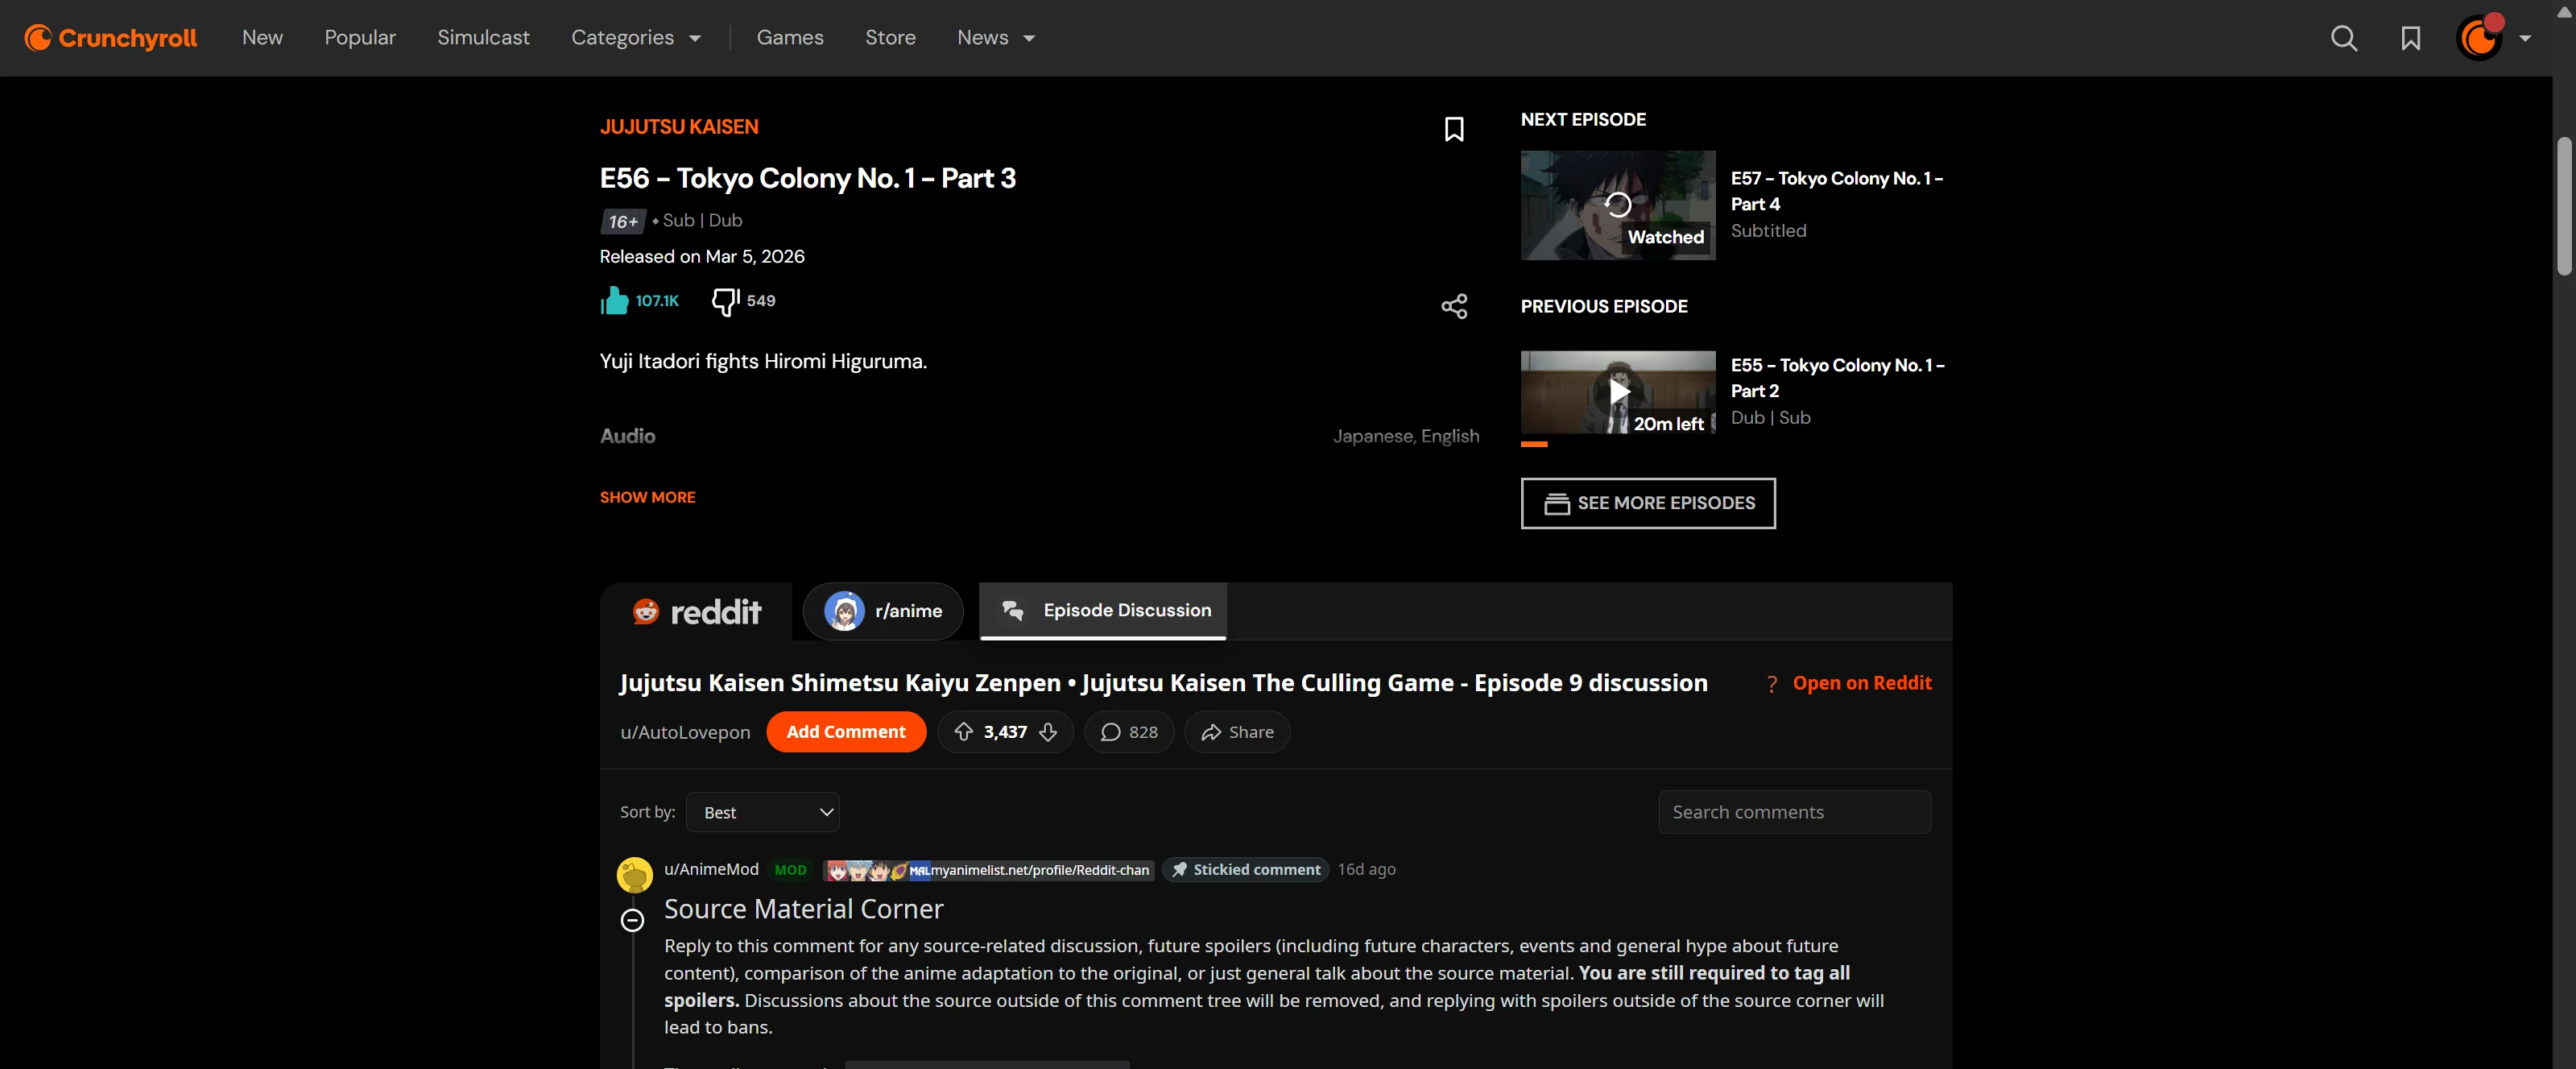
 **Insert inline**: This puts Hayami ***inside*** such element. There are varying use cases for this depending on site layouts. Hayami works this way on Crunchyroll, situated where the site's comments used to go, simulating a familiar feel.
 **Replace element**: This *replaces* the chosen element with Hayami's comment section. You might want to use this if there's an element on-page you don't interact with, but would be perfect to mount Hayami. In the example below, where the comments section *used to be* there now is the Hayami comments section. Of course, you may still want to see the site's comments, so you could choose another element, or head over to icon/text trigger or popup mode instead.
 **Popup only**: This shows a floating Hayami icon on-site, and on-click, shows a popup of the Hayami comments section. As per the example below, the floating Hayami widget sits floating, and on-click opens the UI as a popup.
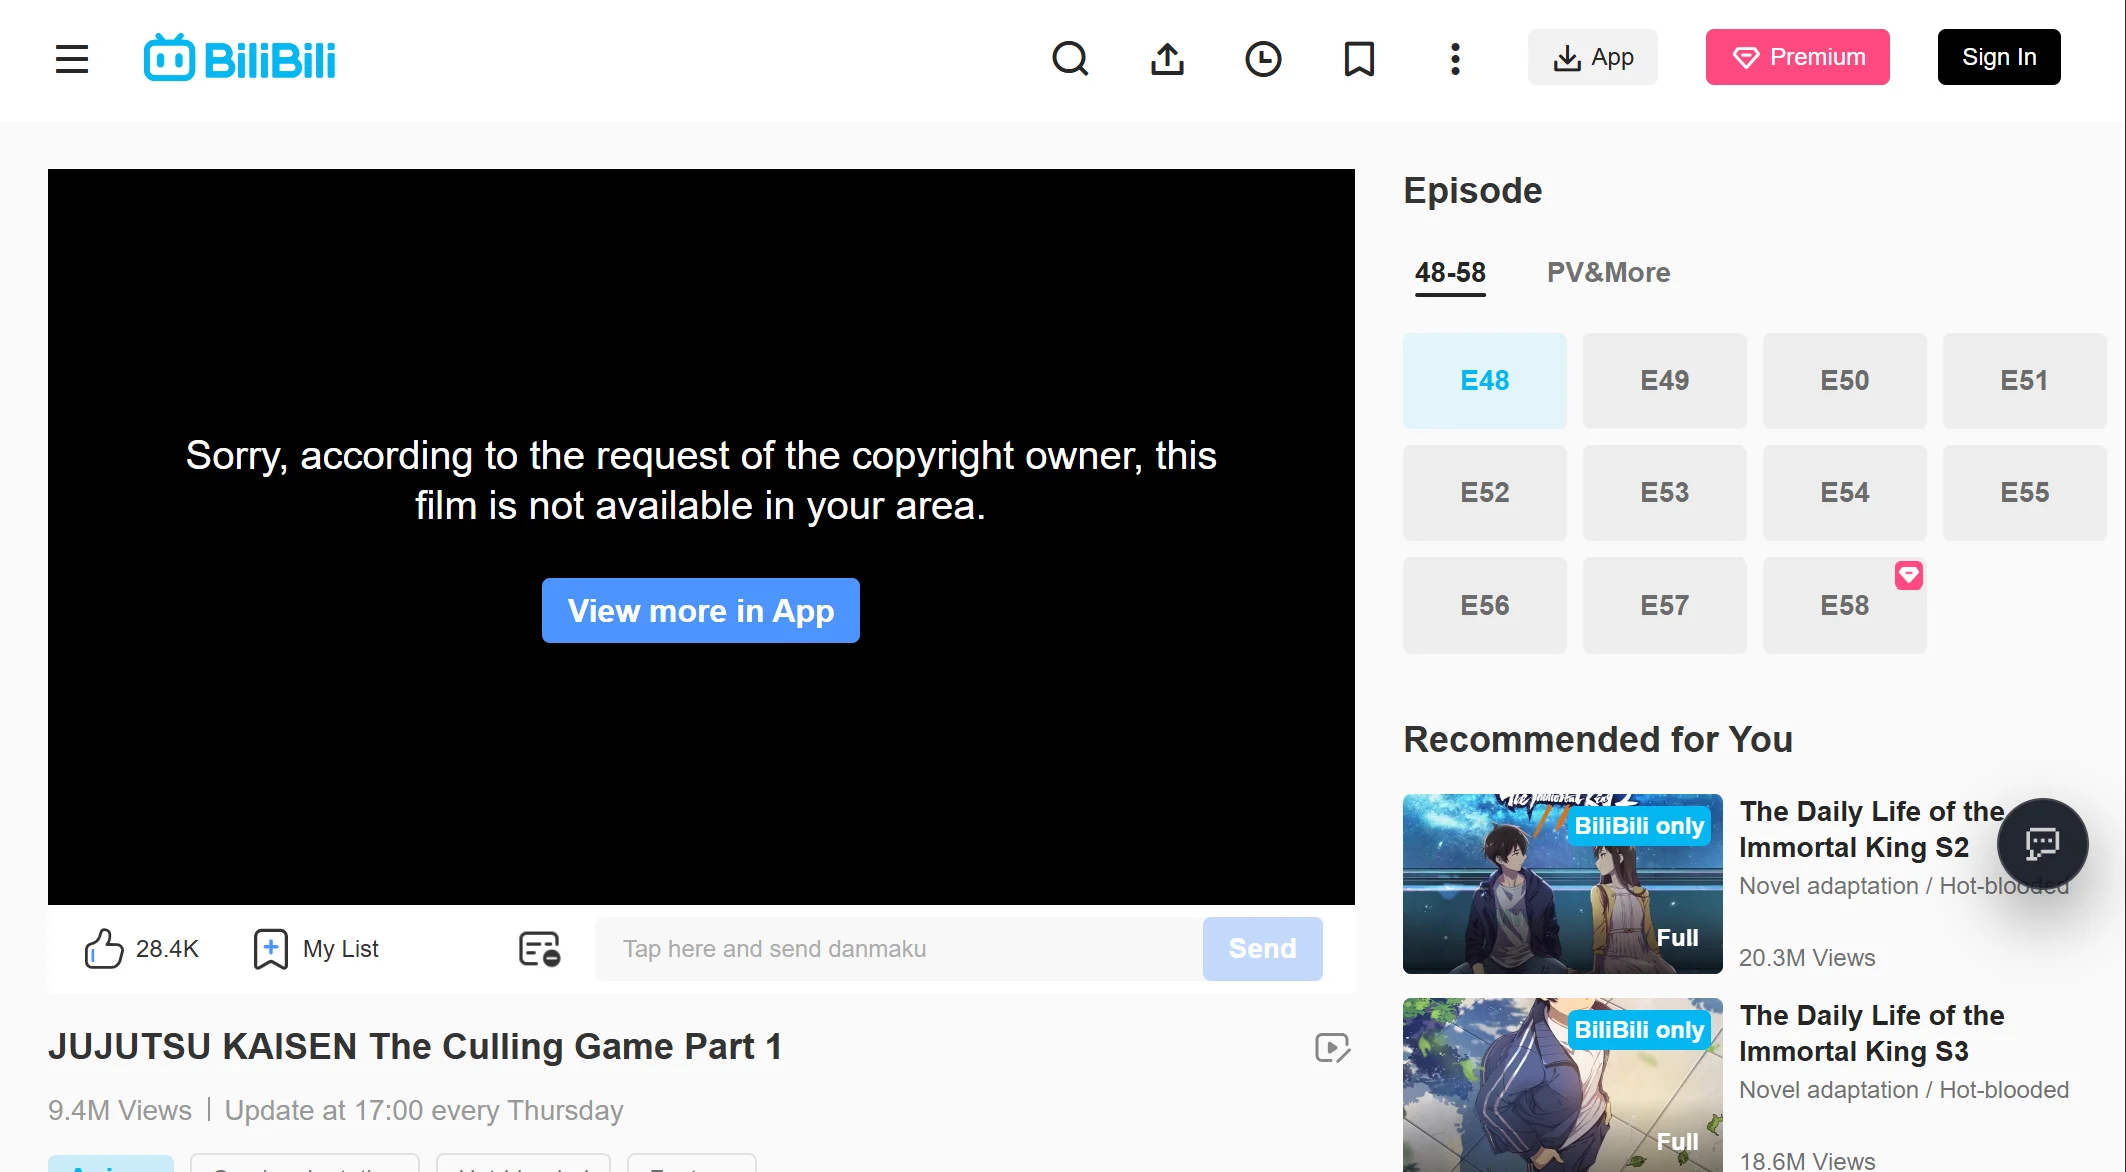
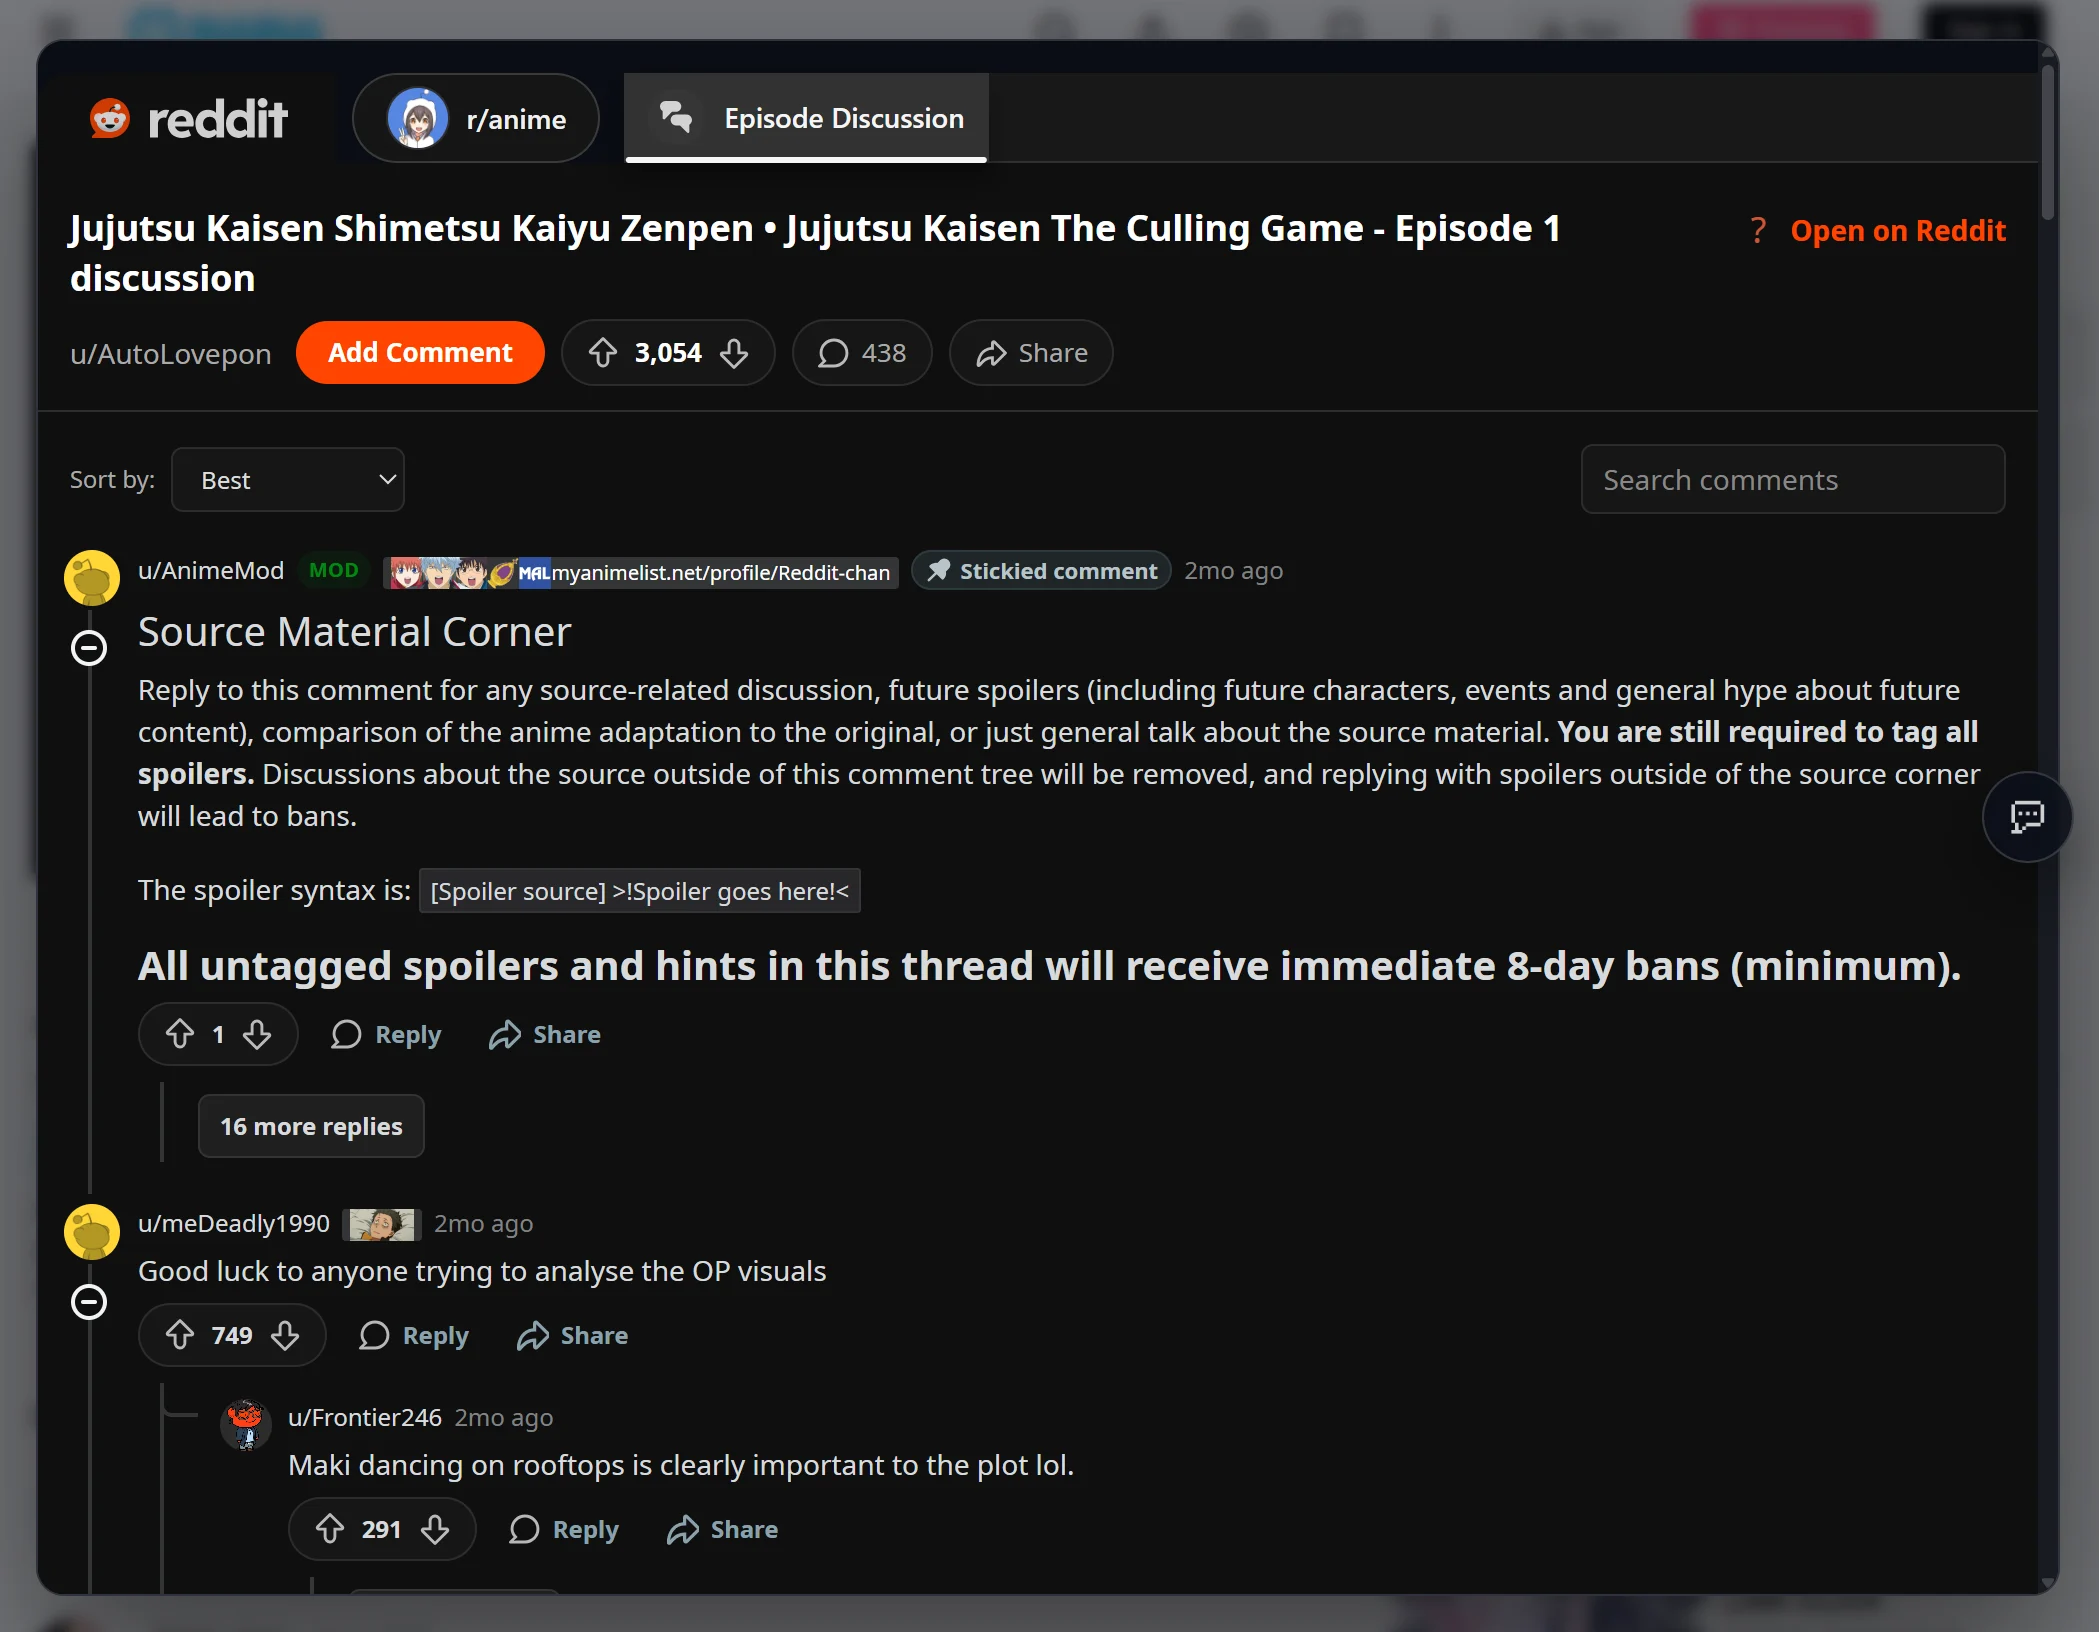 **Icon/text trigger**: This mode allows interchangeable switching between the site's comments and Hayami's comments, intertwining with the site's styles to make it appear natural. "Interchangeable" means it can swap out the site's comments with Hayami's (and vice-versa), or, allow popup mode on-click (instead of a floating icon). This "interchangeable" feature can be triggered via an icon-click or text-click. Icon-click is intended for full-screen video player websites (i.e. Netflix), and text-click is intended for sites that have an embedded video player with other elements surrounding it.
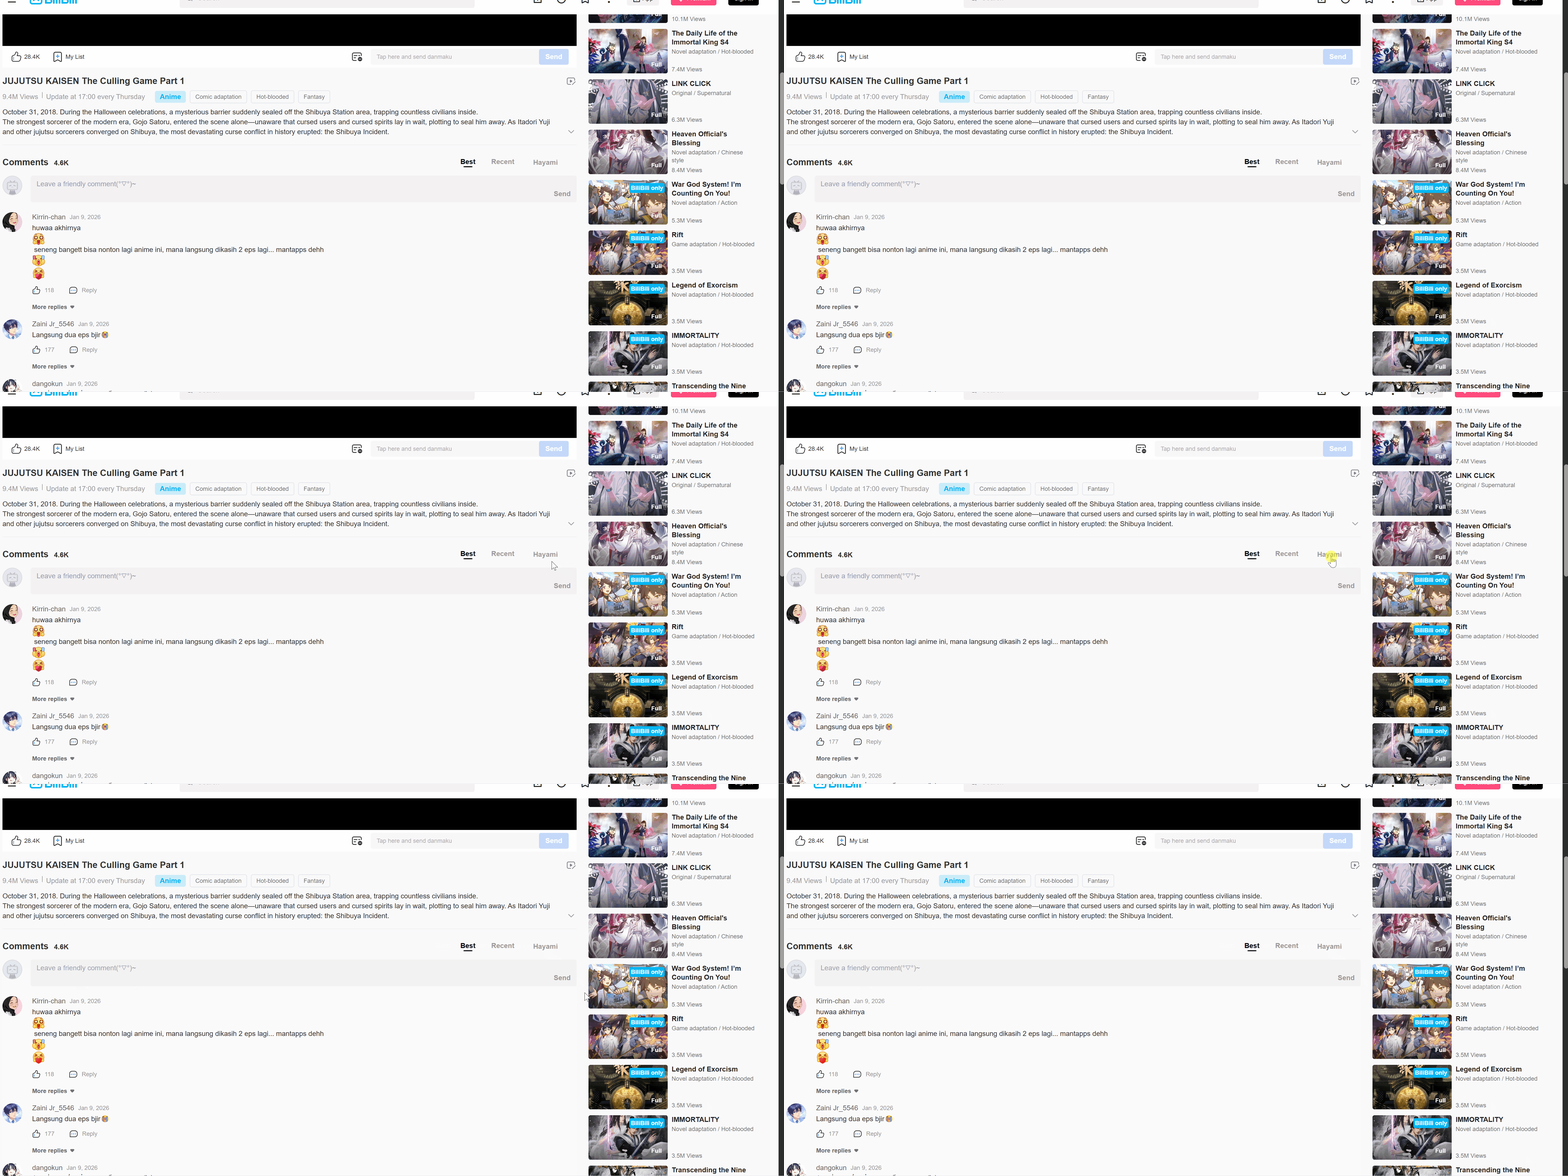
This mode requires a bit more setup, but is worth it, depending if this is how you want Hayami to look on your given website. An example GIF is below on-use on Bilibili for replace mode.
**Icon/text trigger**: This mode allows interchangeable switching between the site's comments and Hayami's comments, intertwining with the site's styles to make it appear natural. "Interchangeable" means it can swap out the site's comments with Hayami's (and vice-versa), or, allow popup mode on-click (instead of a floating icon). This "interchangeable" feature can be triggered via an icon-click or text-click. Icon-click is intended for full-screen video player websites (i.e. Netflix), and text-click is intended for sites that have an embedded video player with other elements surrounding it.
This mode requires a bit more setup, but is worth it, depending if this is how you want Hayami to look on your given website. An example GIF is below on-use on Bilibili for replace mode.
 Once you've made your selection, select it, and continue on with the guide.
### How to choose anime title and episode
Choosing the anime title and episode selector can vary by site, but Hayami should make it fairly straightforward. You can do this either via manually selecting it.
**Anime title selector**: Click 'Pick' and choose the name of the anime on the site.
Once you've made your selection, select it, and continue on with the guide.
### How to choose anime title and episode
Choosing the anime title and episode selector can vary by site, but Hayami should make it fairly straightforward. You can do this either via manually selecting it.
**Anime title selector**: Click 'Pick' and choose the name of the anime on the site.
 **Episode selector**: Choose the episode number on the page. Refrain choosing elements added by other extensions (e.g. MAL-Sync).
 For popup only, no extra configuration required, your all done from here.
### Setting mount selector, and side padding
For all the other modes, one last step: you need to configure the rest.
For popup only, no extra configuration required, your all done from here.
### Setting mount selector, and side padding
For all the other modes, one last step: you need to configure the rest.
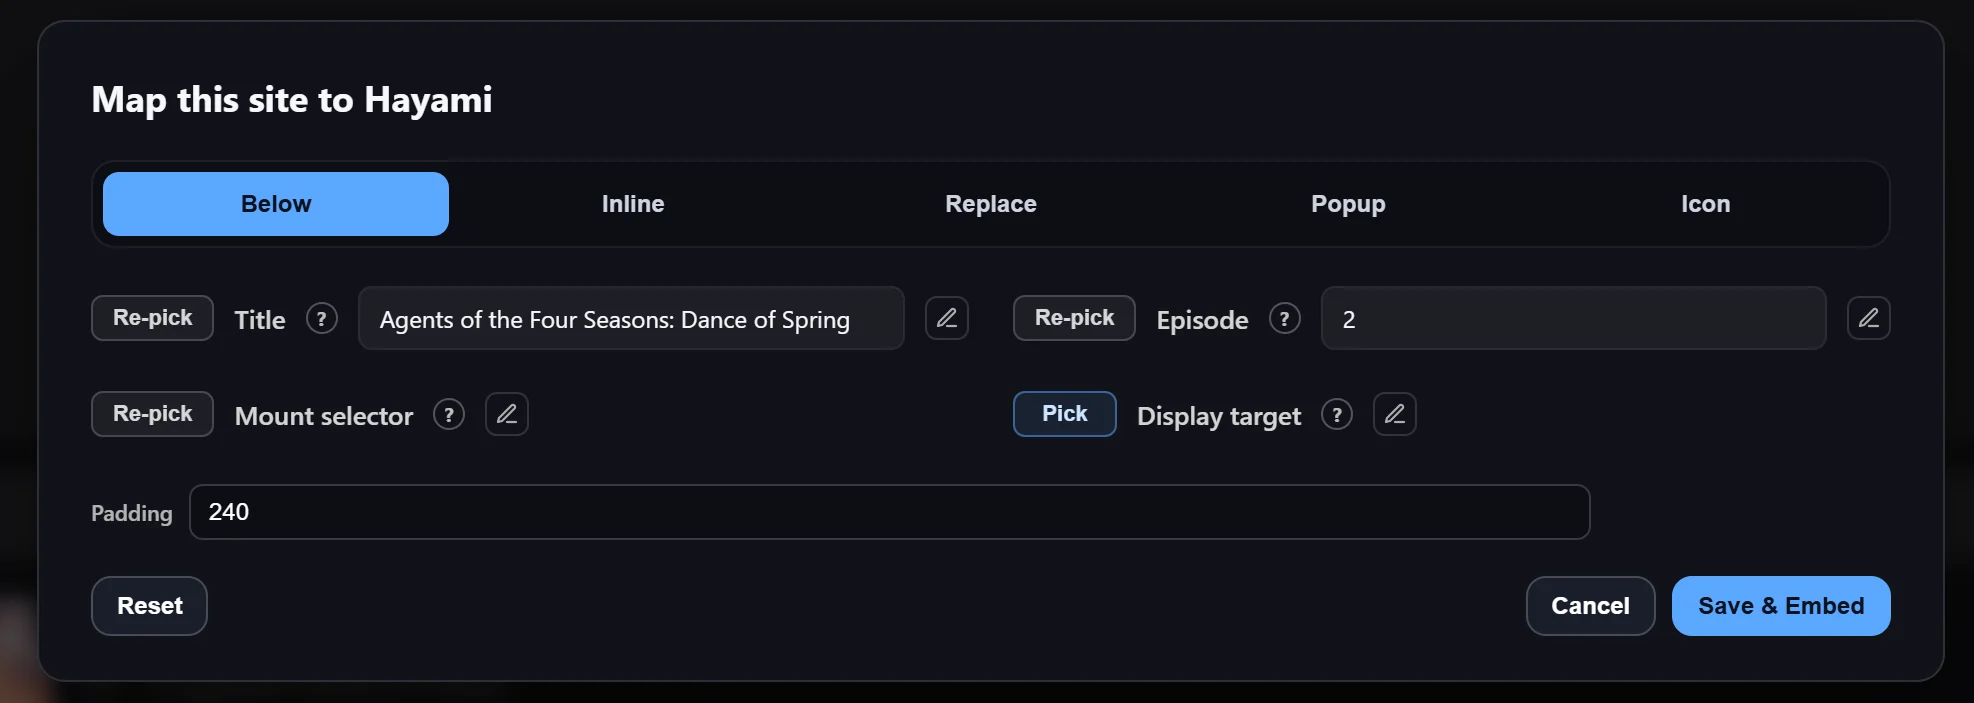 **Mount selector**: Where comments should appear or icon should sit. You can put "body" to append Hayami to the end of the page, if desired.
**Display target**: This can be ignored.
**Side padding**: How much y-padding is added to each side of the Hayami comments section. I'd recommend 240 side padding, but you can adjust how you wish.
After clicking "Save & Embed" (might also need a page refresh), the comments section should be successfully embedded.
## Configuring for metadata-less player site layouts
This is an advanced use-case that Hayami does support, but requires a bit of fiddling. You can read more on how to setup your site on [this page >](/custom-websites-advanced)
## How to import & export custom website mappings
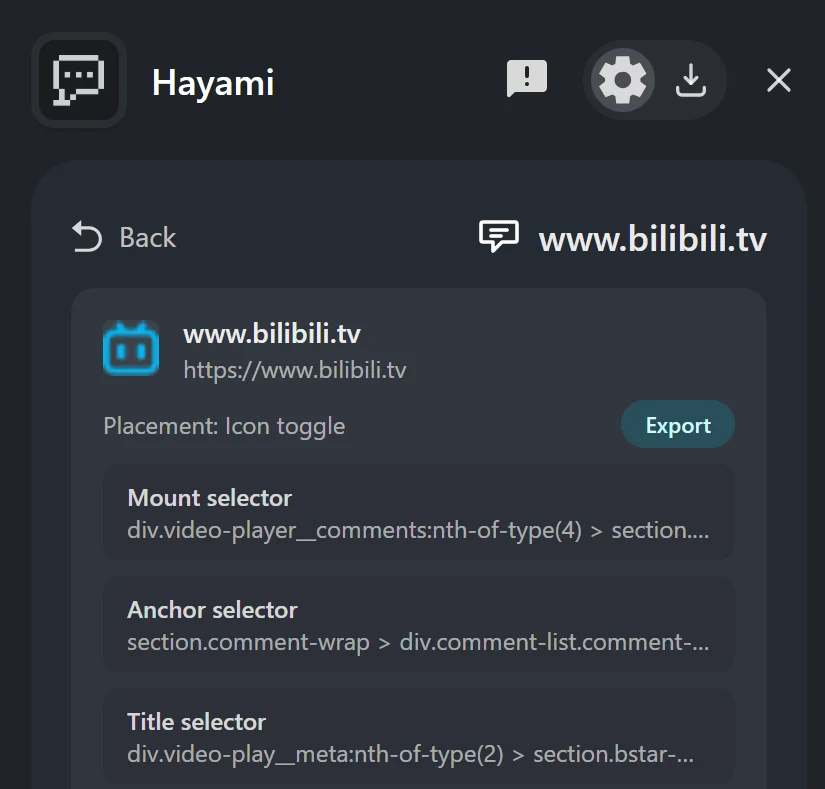
You can export individual custom site mappings by clicking on Hayami, navigating to:\
**Settings > Custom websites >** **info icon on website you want to export > Export**
**Mount selector**: Where comments should appear or icon should sit. You can put "body" to append Hayami to the end of the page, if desired.
**Display target**: This can be ignored.
**Side padding**: How much y-padding is added to each side of the Hayami comments section. I'd recommend 240 side padding, but you can adjust how you wish.
After clicking "Save & Embed" (might also need a page refresh), the comments section should be successfully embedded.
## Configuring for metadata-less player site layouts
This is an advanced use-case that Hayami does support, but requires a bit of fiddling. You can read more on how to setup your site on [this page >](/custom-websites-advanced)
## How to import & export custom website mappings
You can export individual custom site mappings by clicking on Hayami, navigating to:\
**Settings > Custom websites >** **info icon on website you want to export > Export**
 You can also, instead of individually exporting websites, click 'Export all', exporting all custom mappings you've created into one importable file.
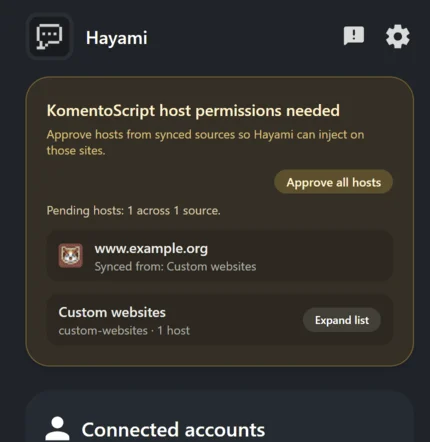
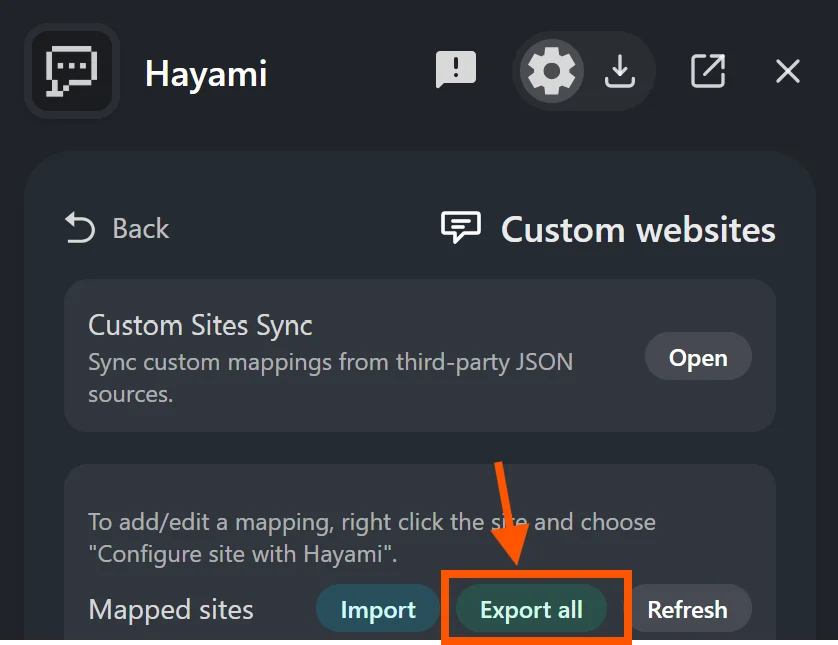 You can share this custom mapping file for others to import if desired. Once you've imported a new custom website mapping, you may notice the Hayami extension with a (!) badge.
 This indicates you need to allow the extension permission to access the site as a host. Open the Hayami popup, you should see a prompt to allow those permissions.
 ## How to sync with custom website mappings
Community members who have combined multiple mappings into one may update their mappings regularly as a visitor of many sites and forums. You can import this JSON directly via the import feature, or you can keep up-to-sync all the time if you desire.
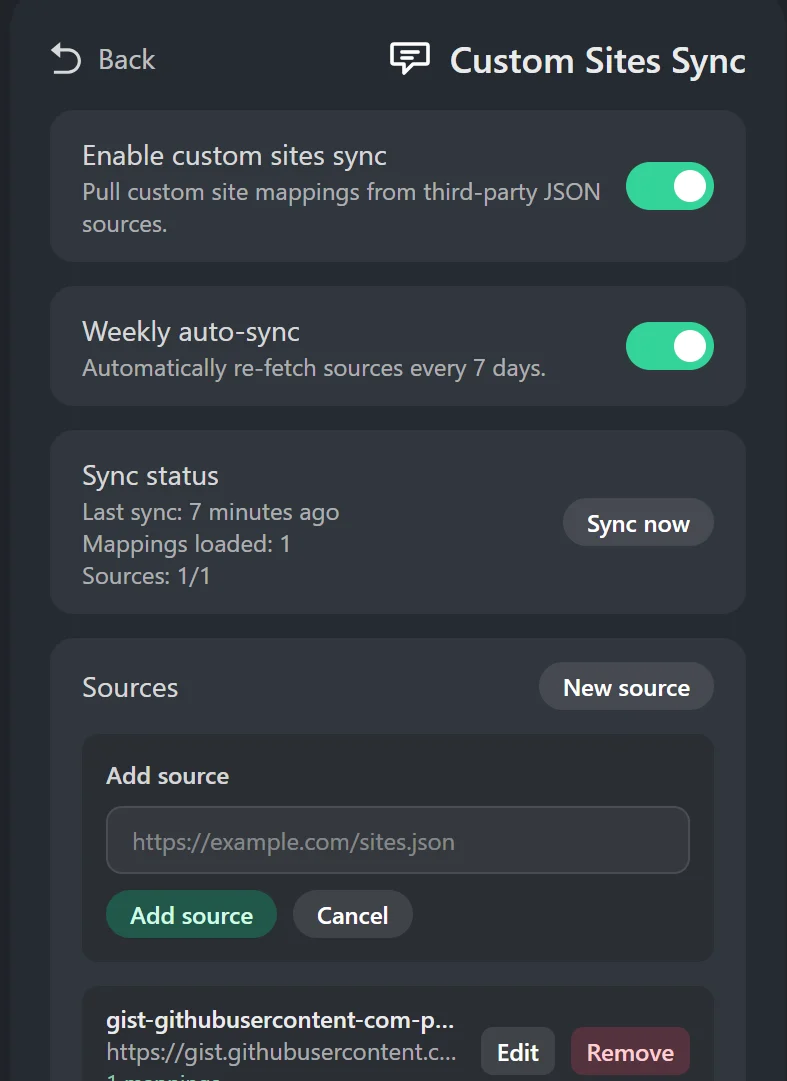
If you want to sync regularly with a mapping source, you can do so by going to:\
**Hayami settings > Custom websites > Custom Sites Sync > New source**, and adding the URL to the sync location.
## How to sync with custom website mappings
Community members who have combined multiple mappings into one may update their mappings regularly as a visitor of many sites and forums. You can import this JSON directly via the import feature, or you can keep up-to-sync all the time if you desire.
If you want to sync regularly with a mapping source, you can do so by going to:\
**Hayami settings > Custom websites > Custom Sites Sync > New source**, and adding the URL to the sync location.
 ## How to make your own custom website sync location
### Automatically managed by Hayami
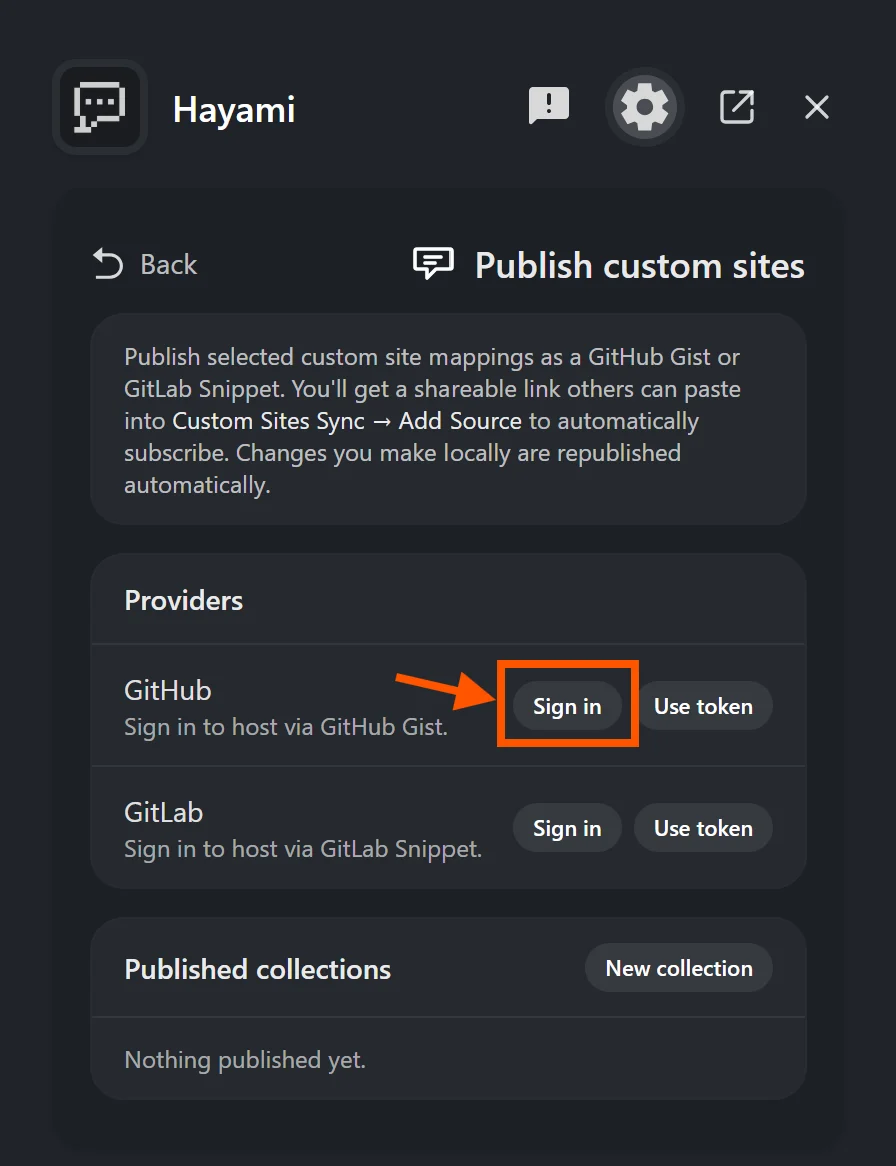
Hayami has GitHub Gist/GitLab Snippet auto-publishing functionality for custom sites, automatically syncing the sites you want to share. Setting it up and sharing your configurations with others is extremely easy to do.
This screen should expose you to two possible connections: GitHub or GitLab. Choose whatever one you prefer. If unsure, I'd recommend GitHub for an easier setup experience. Connect your account, and when finished, it should show logged in and ready to go.
## How to make your own custom website sync location
### Automatically managed by Hayami
Hayami has GitHub Gist/GitLab Snippet auto-publishing functionality for custom sites, automatically syncing the sites you want to share. Setting it up and sharing your configurations with others is extremely easy to do.
This screen should expose you to two possible connections: GitHub or GitLab. Choose whatever one you prefer. If unsure, I'd recommend GitHub for an easier setup experience. Connect your account, and when finished, it should show logged in and ready to go.
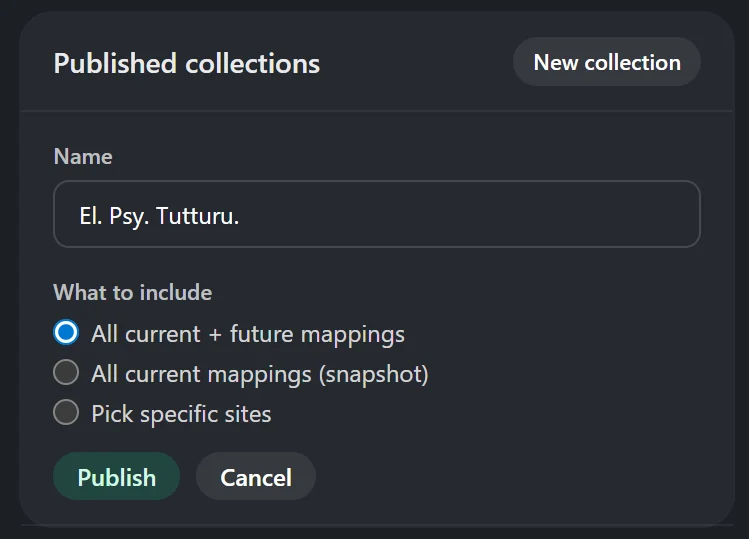
 Give your mapping a name, and choose if you want to share all current + future mappings with others, *just* all current mappings, or you can individually choose and curate the collection for specific sites, if you want. When you're done, hit Publish.
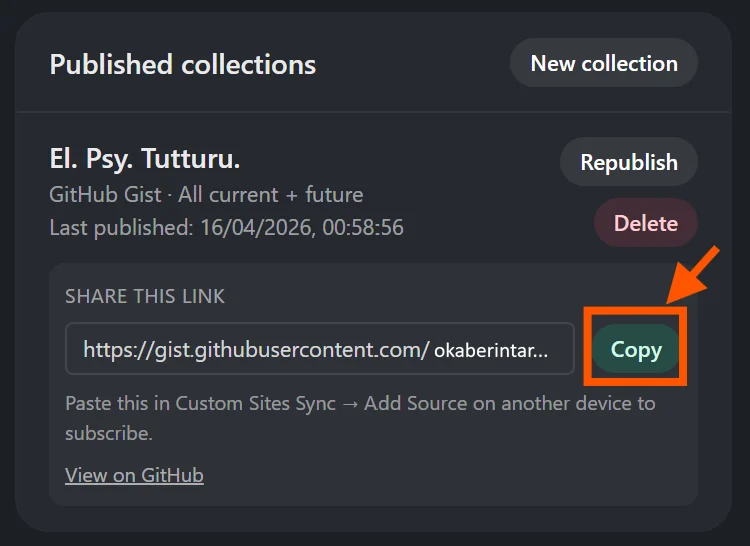
 You now have a sharable link to share with others. They go to the exact same place within Hayami, but to Custom Sites Sync (not Publish Custom Sites). Whoever wants to sync to your source adds that link as a source, accepts permissions for those sites on their end, then they're good to go.
If in-future you decide to do further mappings to Hayami, there may be a delay before Hayami in the background publishes those changes. You can click 'Republish' manually if you want to force a publish right away.
You now have a sharable link to share with others. They go to the exact same place within Hayami, but to Custom Sites Sync (not Publish Custom Sites). Whoever wants to sync to your source adds that link as a source, accepts permissions for those sites on their end, then they're good to go.
If in-future you decide to do further mappings to Hayami, there may be a delay before Hayami in the background publishes those changes. You can click 'Republish' manually if you want to force a publish right away.
 ### Manually managing, and uploading mappings yourself
Using the above guide on importing/exporting your custom-made Hayami mappings, you can then make your own sync to share with others in the community by doing the following:
Click on the info icon on each individual site, and export the sites you want to merge into one configuration intended for sync. If you intend to share *all* of your mappings, click 'Export all' to export all your mappings.
*If you clicked 'Export all' and don't plan to add any more sites, skip this step.*
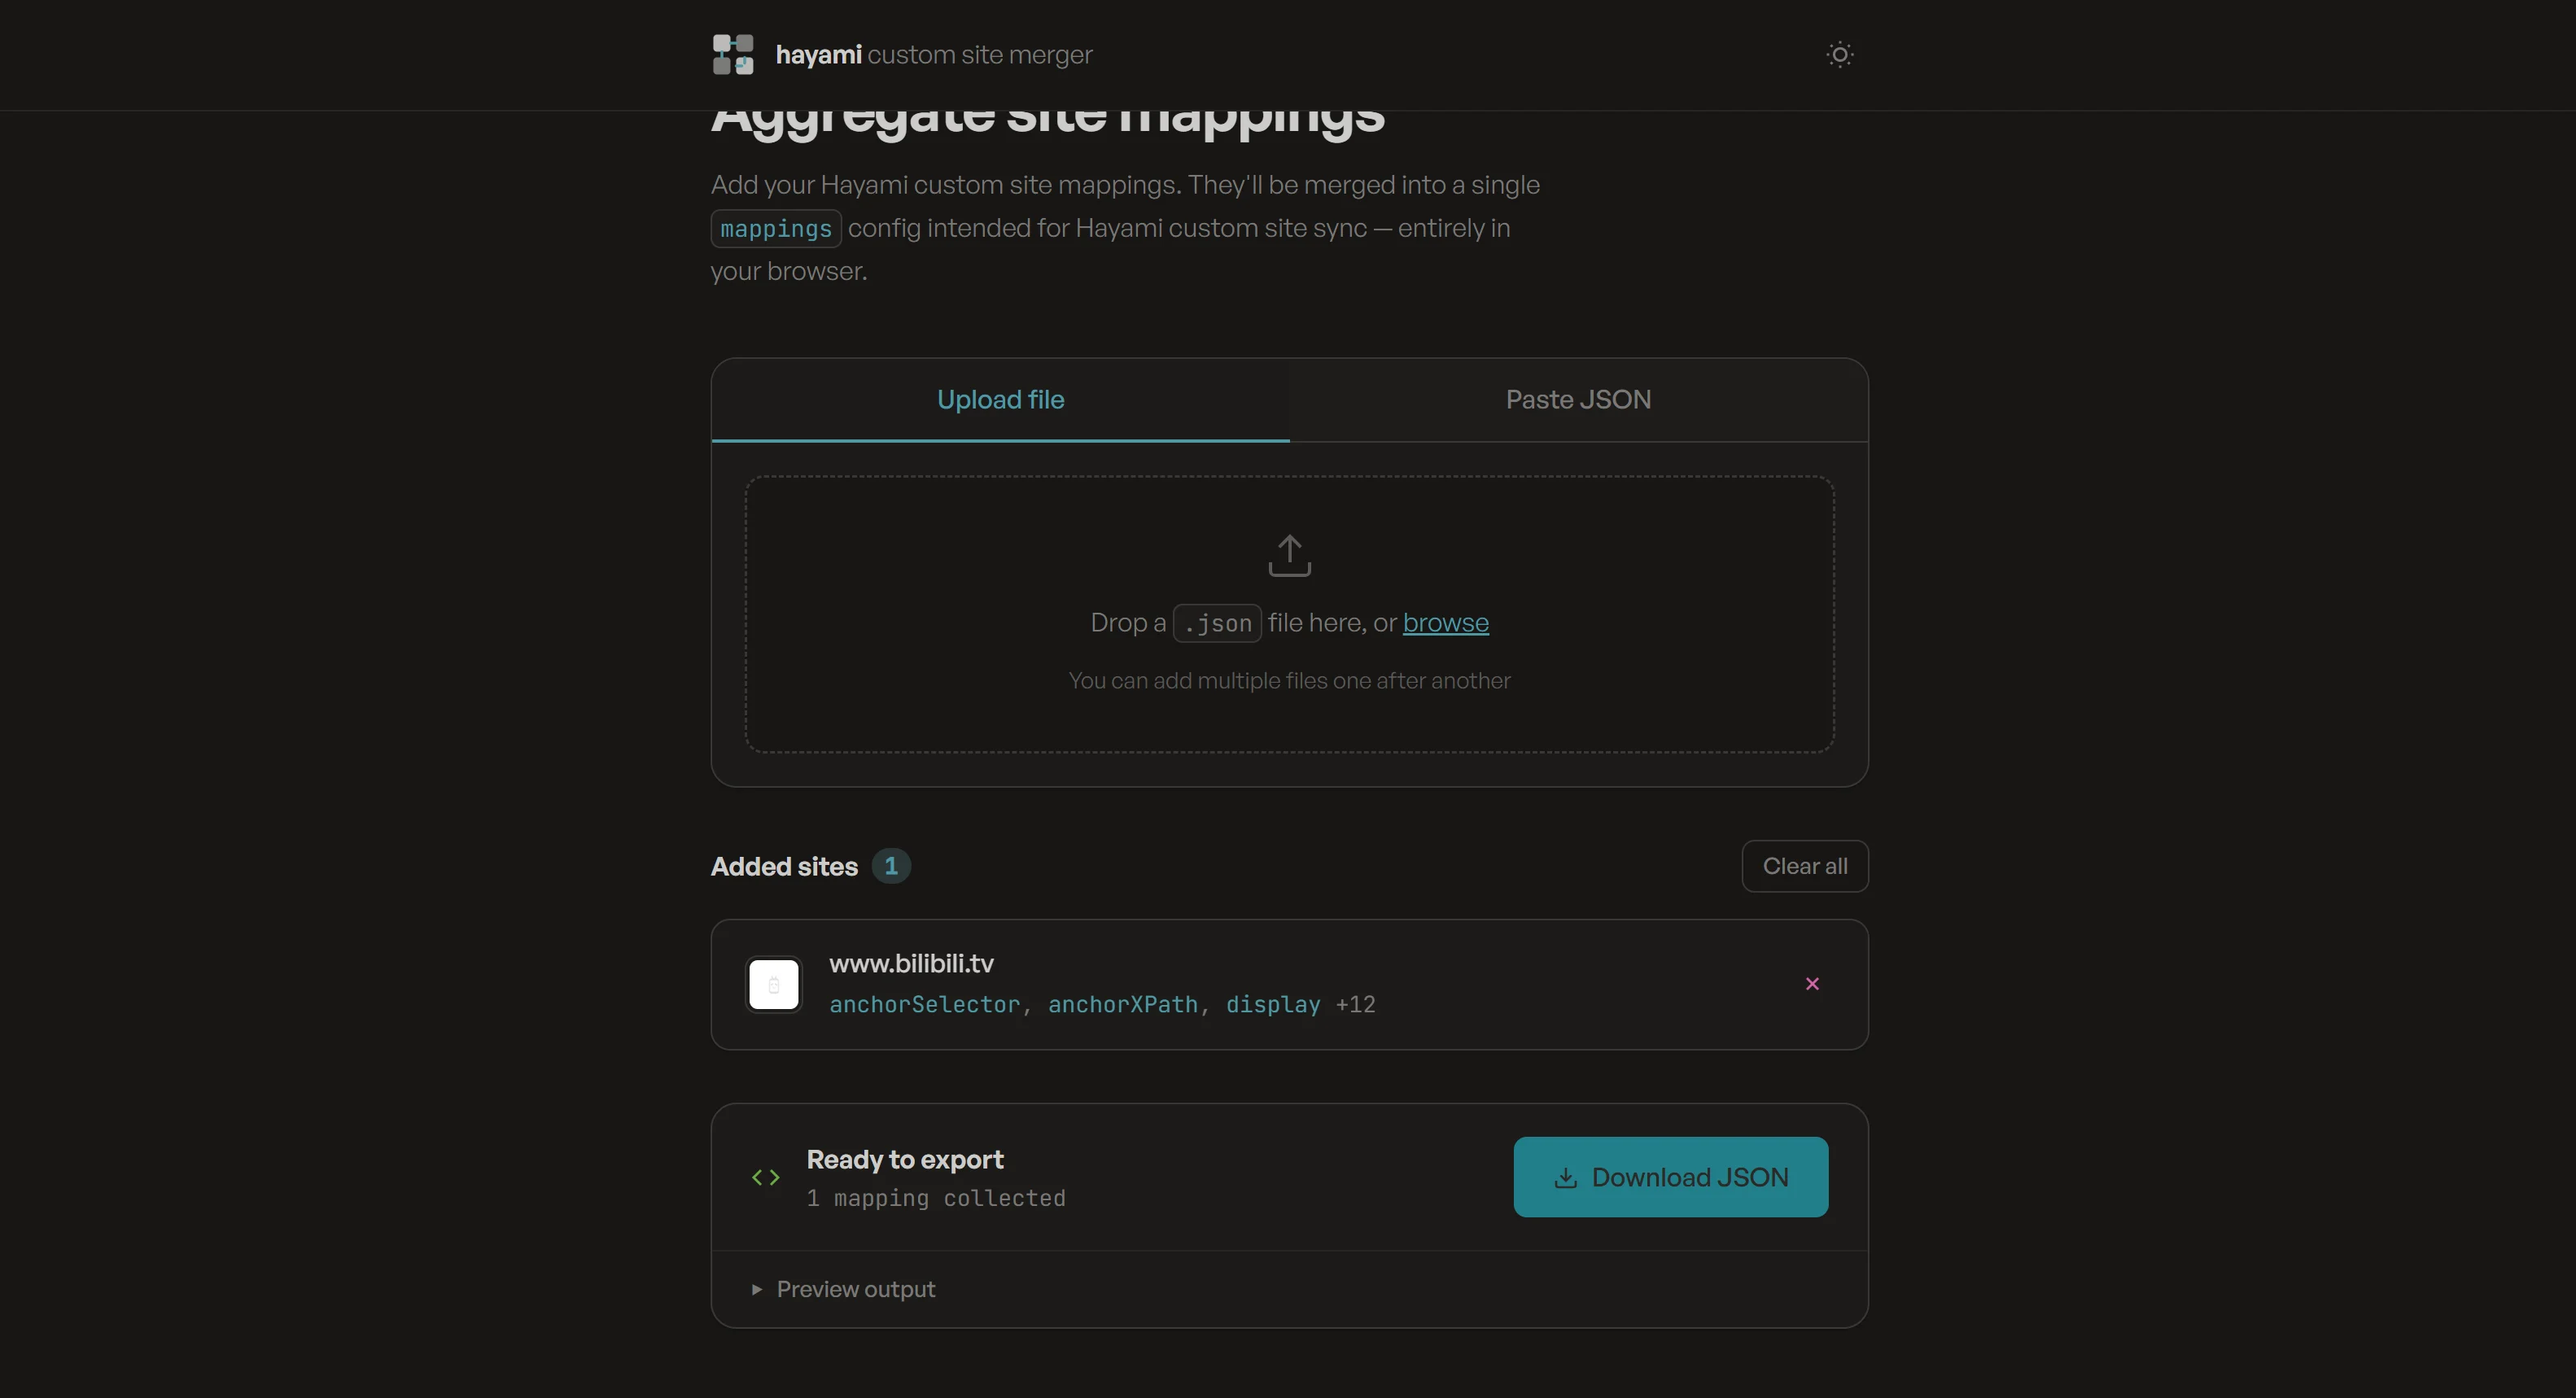
Using Hayami's custom site merger ([https://custom-site-merger.hayami.moe/](https://custom-site-merger.hayami.moe/)), upload all of your site mapper configurations (it's processed locally), and export them as one config by clicking 'Download JSON'.
The importer also supports expanding mappings (e.g. if you clicked 'Export all', or you've already got exported mappings), you can import that file in-future on-top of other mappings communities have made to expand it if desired.
### Manually managing, and uploading mappings yourself
Using the above guide on importing/exporting your custom-made Hayami mappings, you can then make your own sync to share with others in the community by doing the following:
Click on the info icon on each individual site, and export the sites you want to merge into one configuration intended for sync. If you intend to share *all* of your mappings, click 'Export all' to export all your mappings.
*If you clicked 'Export all' and don't plan to add any more sites, skip this step.*
Using Hayami's custom site merger ([https://custom-site-merger.hayami.moe/](https://custom-site-merger.hayami.moe/)), upload all of your site mapper configurations (it's processed locally), and export them as one config by clicking 'Download JSON'.
The importer also supports expanding mappings (e.g. if you clicked 'Export all', or you've already got exported mappings), you can import that file in-future on-top of other mappings communities have made to expand it if desired.
 GitHub Gist ([https://gist.github.com/](https://gist.github.com/)) will be used in the following example. Drag to import your exported JSON directly into GitHub Gist, or open up your JSON and just copy and paste it directly.
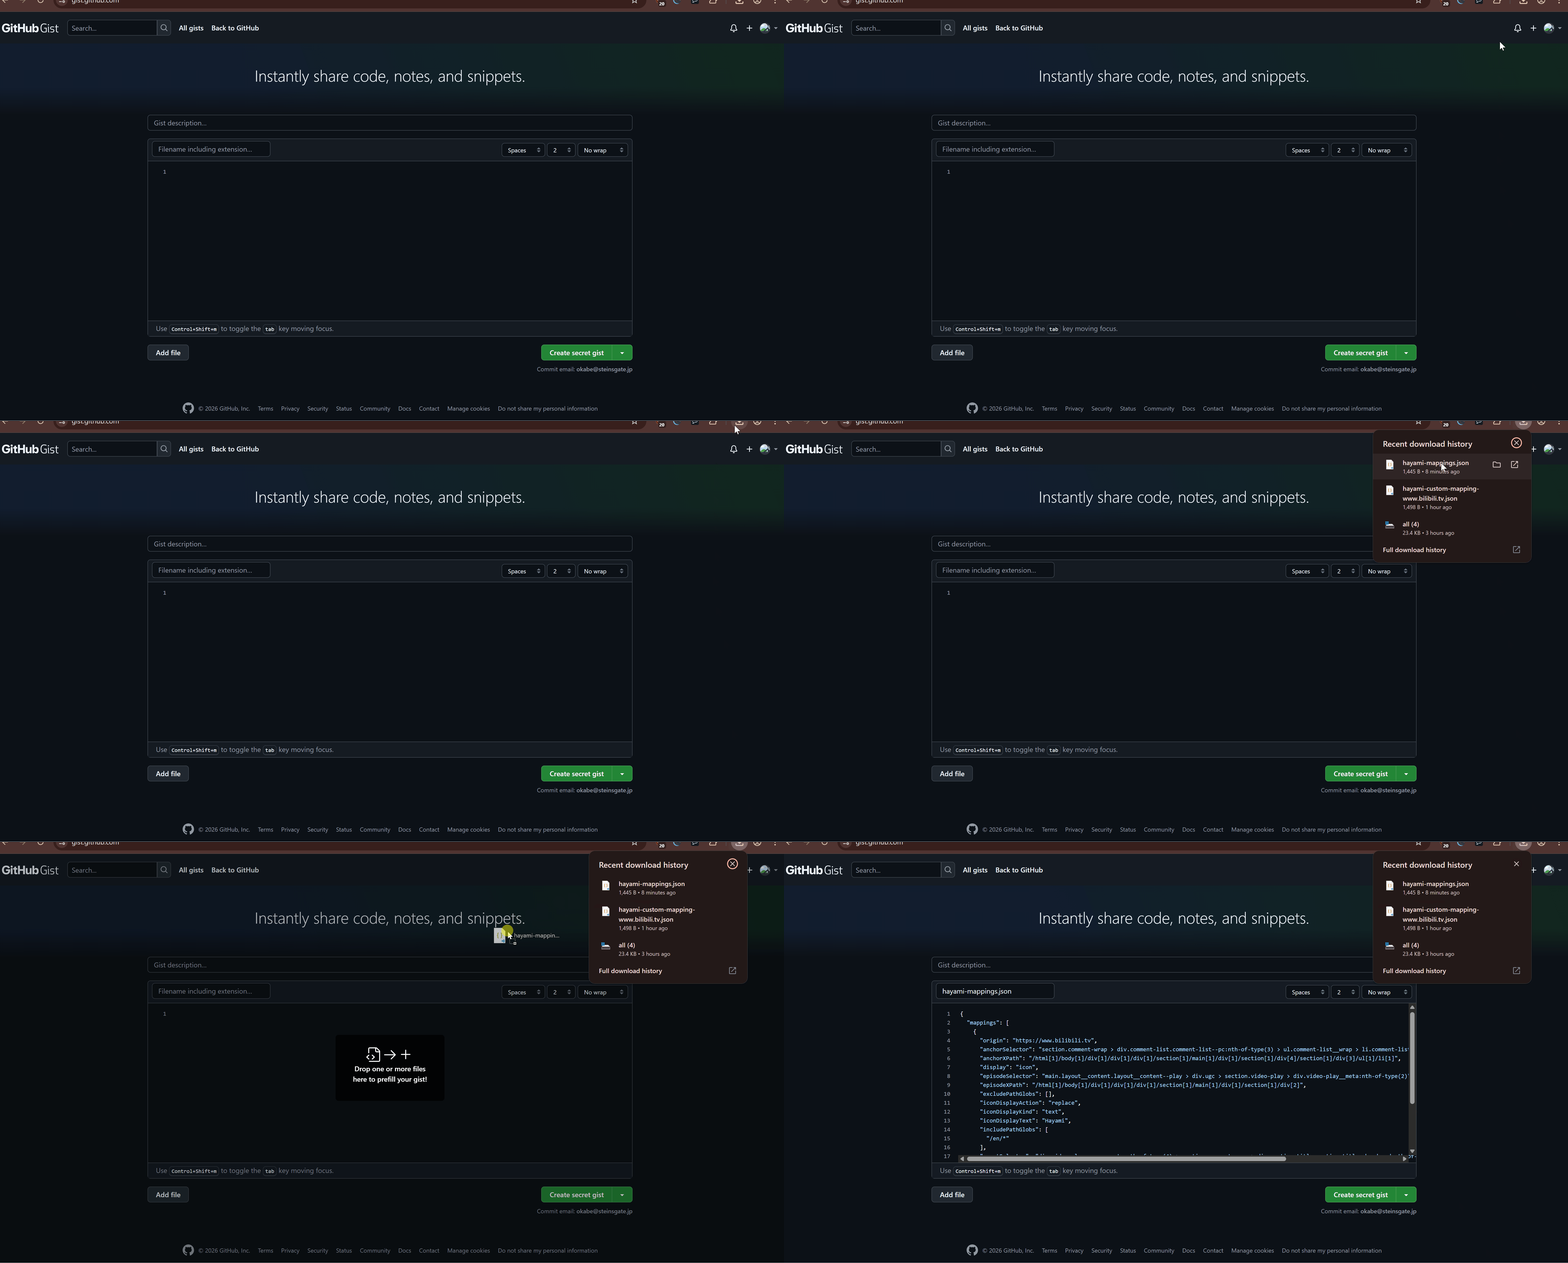 Then click 'Create secret gist', which should create the Gist successfully.
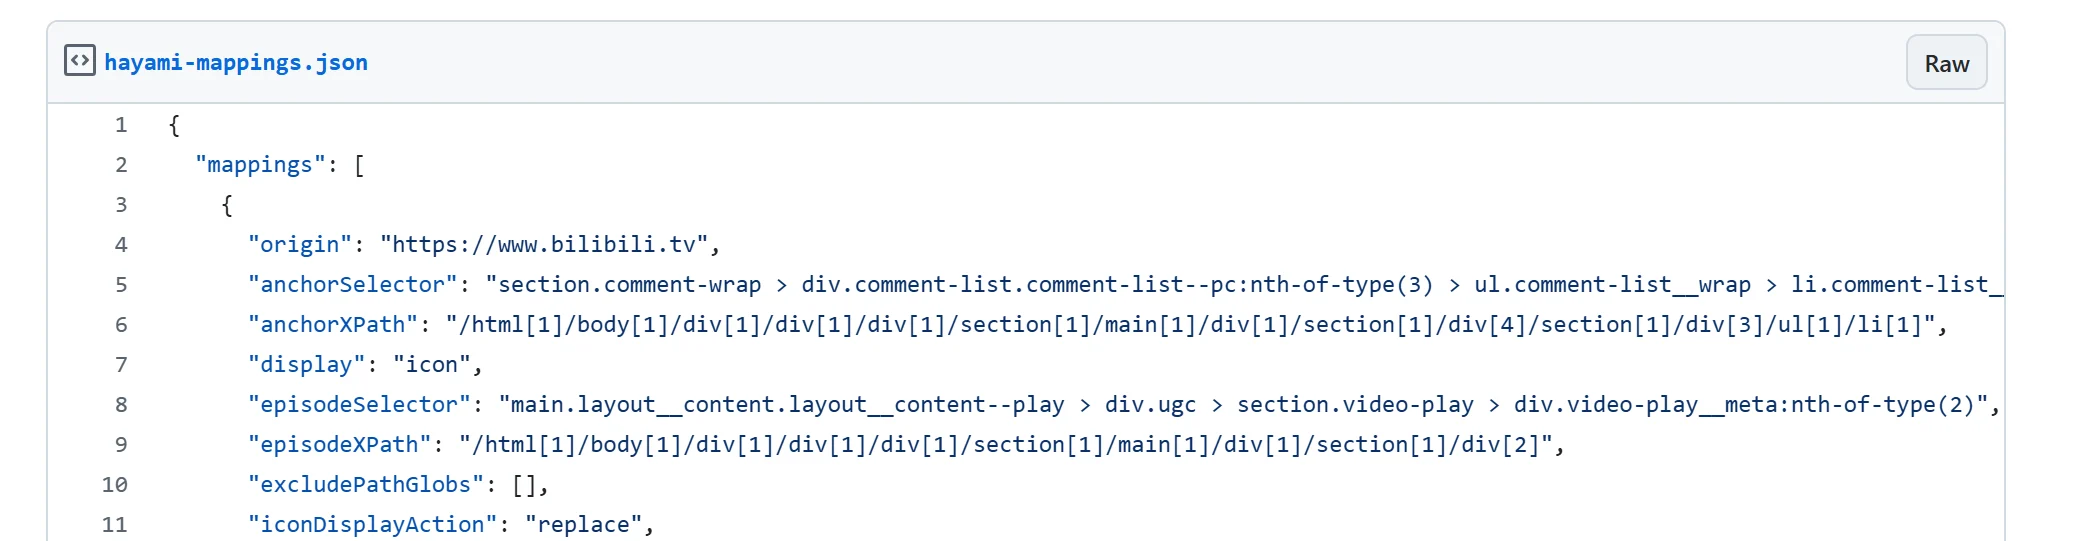
 The portion *after* /raw would mean we'd only sync to this version everytime, no matter if you update it. We don't want that. Remove everything *after* /raw, so it looks like this.
 This URL can be shared with others to sync their custom sites with your mappings.
 Edit your mapping, hit save, and it'll sync across to others as well whenever their weekly sync is due. Or you can tell your community you've updated it, and they can manually click 'Sync now' if they prefer.